
I didn't finish my dress from last week. In fact, I haven't even fixed the bodice yet. My week was full of other things.
But I have something else!
Thursday night I couldn't sleep, and so I grabbed a yard of coral knit, and made some magic happen.

I used a top that I own and had the neckline that I liked [although it isn't a tank top], and I used it to cut out the pieces for a tank. I really only used the curves of the armholes, because I lowered both the front and back neckline, changed the shape of the sides, and lengthened the hem. But it was a launching point.
My machine really didn't like this knit because it was so thin and stretchy, so I laid some paper over top as I stitched, and it did just fine. I'm all about the tricks!
Now, let me tell you, this thing is comfortable. It was tempting to just leave it like that and wear it around the house when I'm being a bum. And I might make another one for that purpose.

But then I decided I'd add a peplum-type feature. Is it still a peplum when it's in a knit? Anyways, I know that many people would have cut their shirt where they wanted the elastic to go, and then sewn the elastic into a casing. However, I'm all about the shortcuts, so I just folded my shirt up [right sides together] where I wanted the elastic to go, and sewed a 1/2" seam. To get the elastic the right size, I placed it around myself where I wanted it to sit, just comfortably, and then took off about 2" off that length. Add a safety pin to the end to feed it through the casing that was just made, and I was all set! By the way, I just cut a hole into the side seam to feed the elastic. I didn't stitch it up because the knit won't fray, but if you use another material you will then have to stitch your hole back together.
 |
| I can't get this to not be sideways for some reason |
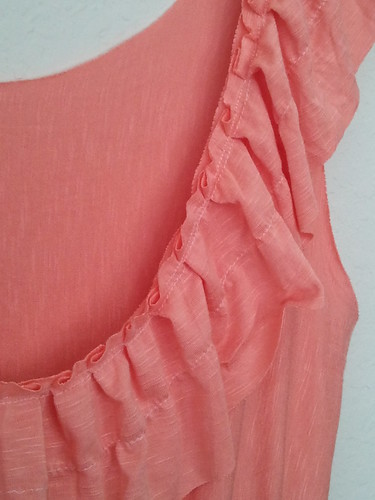
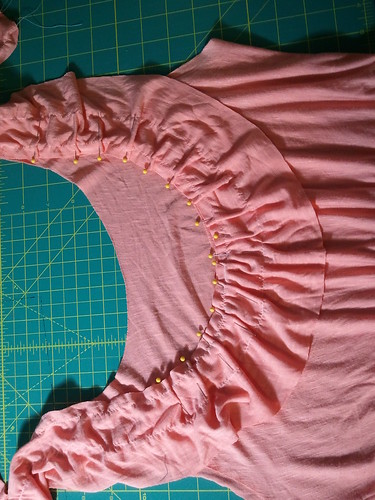
To make the ruffles I cut a piece at 3.5" and stitched 2 lines about an inch apart. I wanted a light ruffle at those locations. To make the overall ruffle, I made little pleats at the neckline as I added the strip. This required patience, and lots of pins! And in fact, after I took that photo I noticed that the strip was on backwards [there is a slight texture/print to the knit] and so I had to re-do it! That's what I get for doing this at 2 am.


Maybe people would be interested in me walking through the details with more pictures so you can make your own shirt? Holler if you'd like that :)
This turned out super cute... that ruffle looks great! (It looks really complicated!)
ReplyDeleteOMG! What a gorgeous top! Does this mean if I ever get a peep into your wardrobe all the clothes in there will be handmade? =D
ReplyDelete